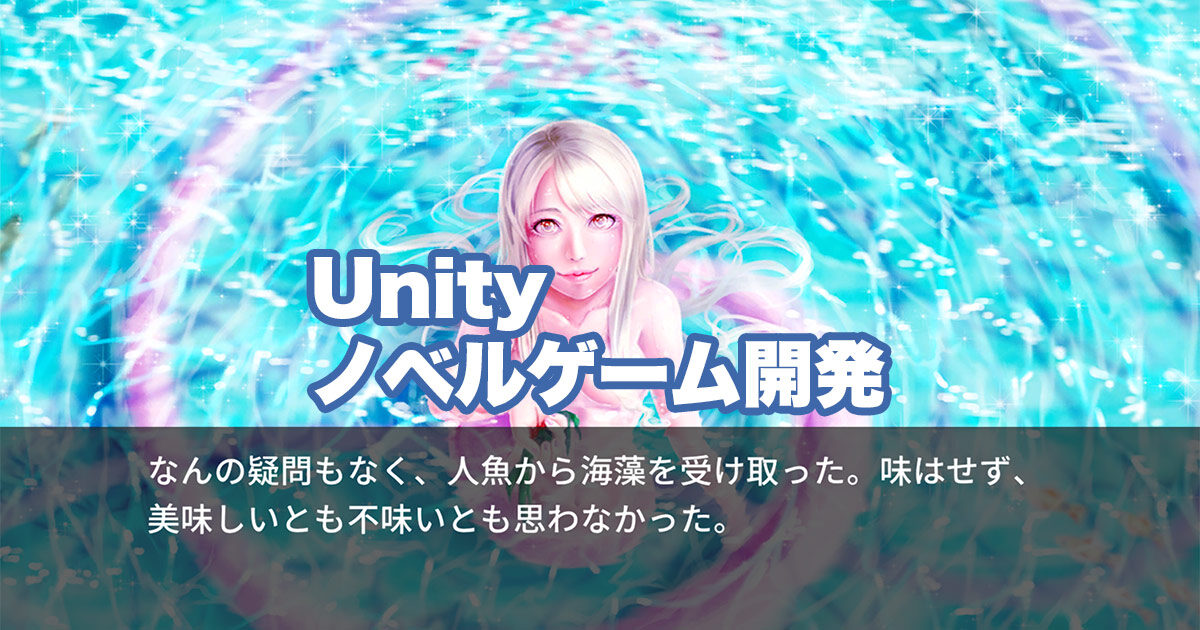
人魚との触れ合いを描いた小説、「ELENA 人魚と過ごした時間」のゲーム化を目指し、日々コツコツと開発を進めているのですが、もう少し時間がかかりそうです。
さて、そんなわけで、今回はUnityによるゲーム開発の状況を少しだけお見せしながら、Unityによるノベルゲーム開発の方法を紹介していきたいと思います。
今回作成するノベルゲームについて
まず、今回作成するノベルゲームについてです。
次のようなゲームを作成します。(早送りしています)

今回、行ないたいのは、次のようなものです。
では、はじめていきましょう。
Unityのダウンロードとインストールについて
Unityのインストールがまだの方は、以下の記事を参考にしてください。
新しいプロジェクトの作成
では、今回のノベルゲーム開発用に新しいプロジェクトを作成します。
テンプレートから「2D」を選択し、プロジェクト名を付け、「プロジェクトを作成(Create project)」をクリックします。

シーンの名前を変更
デフォルトではシーンの名前がSampleSceneになっているので変更します。
変更するには、プロジェクト(Project)にあるAssetsの中のScenesから「SampleScene」を右クリックし、「名前を変更(Rename)」をクリックします。

今回は「MainScene」に変更しました。

次のようなダイアログが表示された場合は、「再ロード(Reload)」をクリックします。

ノベルゲームの基本となる階層を作る
今回作りたいノベルゲームの階層は、次のようにしようと思います。

一番後ろに「背景」を、その手前に「イベントCG」を表示します。
その手前にメッセージボックスを、さらにその手前にメッセージを表示します。
今回、立ち絵は使いませんが、背景の上に画像を表示する、という意味ではイベントCGの表示と同じですので、工夫すればでできると思います。
ではさっそく、この階層を作っていきましょう。
ヒエラルキー(Hierarchy)のなにもないところで右クリックし、「UI」、「パネル(Panel)」と選択します。

すると「Canvas」が作られ、その中にパネルが作られますので、名前を「Game」に変更します。

さらに、「Game」オブジェクトを右クリックして、「空のオブジェクトを作成(Create Empty)」をクリックします。

オブジェクトの名前は「Background」にします。

再び「Game」オブジェクトを選択して、同じ手順で「空のオブジェクト」を作成し、名前を「Event」にします。

こんどは、パネルを作成します。
Gameオブジェクトをクリックし、「UI」から「パネル(Panel)」を選択します。

名前は、「MessageWindow」にします。

さらに、MessageWindowオブジェクトを右クリックして、「UI」から「テキスト – TextMeshPro(Text – TextMeshPro)」を選択します。

次のような画面が開いたら、「Import TMP Essentials」をクリックします。

すると、「Text(TMP)」オブジェクトが作られます。
(TMP Importerは閉じてしまって構いません)

この「Text(TMP)」オブジェクトは、「MainText」という名前に変更します。

これで、今回のノベルゲーム開発での、階層ができました。
それぞれのオフジェクトの設定
つづいて、さきほど作ったオブジェクトの設定をしていきましょう。
Main Cameraの設定
まず、Main Cameraの設定をしていきましょう。
ヒエラルキー(Hierarchy)で、「Main Camera」を選択します。

インスペクター(Inspector)から、背景(Background)の色を黒に変えます。

これでMain Cameraの設定の完了です。
Canvasの設定
つづいて、Canvasの設定をしていきます。
ヒエラルキー(Hierarchy)から、「Canvas」を選択しましょう。

インスペクター(Inspector)から、以下の部分を変更します。
- レンターモード(Render Mode)を「スクリーンスペース – カメラ(Screen Space – Camera)」に変更。
- レンダーカメラ(Render Camera)を、「Main Camera」に変更。
- UIスケールモード(UI Scale Mode)を「画面サイズに拡大(Scale With Screen Size)」に変更。
- さらに、参照解像度(Reference Resolution)を「1520」x「720」に変更。
- マッチ(Match)を「1」に変更。

これでCanvasの設定の完了です。
Gameオブジェクトの設定
つづいて、Gameオブジェクトの設定をしていきます。
ヒエラルキー(Hierarchy)から、「Game」を選択しましょう。

インスペクター(Inspector)から、以下の部分を変更します。
- アンカープリセット(Anchor Presets)を、縦が「middle」、横が「center」のものに変更。
- 幅を「1520」、高さを「720」に変更。
- 色(Color)を黒くし、Aは「255」に設定。

これで、Gameオブジェクトの設定は完了です。
Backgroundオブジェクトの設定
つづいて、Backgroundオブジェクトの設定をしていきます。
ヒエラルキー(Hierarchy)から、「Background」を選択しましょう。

インスペクター(Inspector)で、以下の部分を変更します。
- アンカープリセット(Anchor Presets)を縦横「stretch」のものに変更。
- 上下左右(Top、Bottom、Left、Right)の値をすべて「0」に変更。

これで、Backgroundオブジェクトの設定は完了です。
Eventオブジェクトの設定
つづいて、Eventオブジェクトの設定をしていきます。
ヒエラルキー(Hierarchy)から、「Event」を選択しましょう。

インスペクター(Inspector)で、以下の部分を変更します。
- アンカープリセット(Anchor Presets)を縦横「stretch」のものに変更。
- 上下左右(Top、Bottom、Left、Right)の値をすべて「0」に変更。

これで、Eventオブジェクトの設定は完了です。
MessageWindowオブジェクトの設定
つづいて、MessageWindowオブジェクトの設定をしていきます。
ヒエラルキー(Hierarchy)から、「MessageWindow」を選択しましょう。

インスペクター(Inspector)で、以下の部分を変更します。
- 上の値を「480」に変更。
- アンカーピボット(Anchors Pivot)のYの値を「0」に変更。
- 色(Color)を、R「40」、G「40」、B「40」、A「180」に変更

これで、MessageBoxオブジェクトの設定の完了です。
MainTextオブジェクトの設定
MainTextオブジェクトの設定をしていきます。
ヒエラルキー(Hierarchy)から、「MainText」を選択しましょう。

インスペクター(Inspector)で、以下のように変更します。
- 幅(Width)を「980」、高さ(Height)を「200」に変更。

これで、ノベルゲームの階層が完成しました。
再生してみると、次のようになります。

GameManagerの作成
つづいて、スクリプトを書いていきましょう。
まずは、ゲーム全体を管理するための、GameManagerを作っていきます。
プロジェクトからAssetsを選択し、右クリック、「作成」、「フォルダー」をクリックしましょう。

フォルダ名は「Scripts」にします。

いま作ったScriptsフォルダを開き、右クリック、「作成」、「C# スクリプト(C# Script)」をクリックしましょう。

ファイル名は「GameManager」とします。

ここで、GameManagerのアイコンが歯車(ギア)になってしまいました。
なぜこうなるのかは分からないのですが、すこし心配になりますよね。
そこで、クラスを名前空間で管理することにします。
これで、この歯車(ギア)アイコンも解決できます。
では、たった今作成したファイル「GameManager.cs」を、以下のように書き換えてみてください。
GameManager.cs
using System.Collections;
using System.Collections.Generic;
using UnityEngine;

namespace NovelGame
{
    public class GameManager : MonoBehaviour
    {
        // Start is called before the first frame update
        void Start()
        {

        }

        // Update is called once per frame
        void Update()
        {

        }
    }
}
GameManagerクラス全体を、NovelGameという名前空間に入れました。
すると、さきほどの歯車(ギア)アイコンが、いつものC#ファイルのアイコンになります。

さらに、スクリプトを編集していきます。
GameManagerに作った変数やメソッドなどは、他のクラスからも使いたいものがほとんどだと思いますので、Instanceプロパティを作成して、別のクラスから変数や関数を呼び出せるようにします。
また、Start、Updateメソッドは、今回は使わないので削除しました。
using System.Collections;
using System.Collections.Generic;
using UnityEngine;

namespace NovelGame
{
    public class GameManager : MonoBehaviour
    {
        // 別のクラスからGameManagerの変数などを使えるようにするためのもの。(変更はできない)
        public static GameManager Instance { get; private set; }

        void Awake()
        {
            // これで、別のクラスからGameManagerの変数などを使えるようになる。
            Instance = this;
        }
    }
}では、ヒエラルキー(Hierarchy)で、「MainScene」右クリックして、「ゲームオブジェクト(GameObject)」から、「空のオブジェクトを作成(Create Empty)」をクリックします。

名前は「GameManager」にします。

さらに、今作成したGameManagerオブジェクトに、さきほどのGameManagerファイルを、ドラッグ&ドロップでアタッチします。

これで、GameManagerを作っていくための準備が整いました。
テキストの表示
つづいて、ノベルゲームに一番大切な、テキストの表示をしていきます。
日本語のテキストを表示できるようにする
まずはフォントの設定をしていきます。
日本語に対応した、お好きなフォントを用意しておいてください。ここでは源ノ角ゴシックを使います。
では、Unityの画面で、Assetsに「Fonts」フォルダを作成します。

さらにFontsフォルダを開き、用意しておいたフォントをドラッグ&ドロップします。

「ウィンドウ(Window)」から、「TextMeshPro」を選択し、「フォントアセットクリエーター(Font Asset Creator)」をクリックします。

ウィンドウが開いたら、次のように指定します。

また、「Custom Character List」には、使いたい文字を入力する必要がありますが、日本語ではとてもたくさんの文字を使いますので、入力は大変です。
しかし、そういった文字をすべてまとめてくださっている方がいますので、そちらを使わせていただこうと思います。(ありがとうございます)
GitHub Gist(kgsi/japanese_full.txt): https://gist.github.com/kgsi/ed2f1c5696a2211c1fd1e1e198c96ee4?h=1
上記からダウンロードしたtxtファイルの内容をすべてコピーし、「Custom Character List」に貼り付け、「Generate Font Atlas」をクリックします。

「Save」をクリックします。

次のように表示されたら、再び「Save」をクリックします。

「フォントアセットクリエーター(Font Asset Creator)」を閉じて、ヒエラルキー(Hierarchy)から「MainText」オブジェクトを選択します。

インスペクター(Inspector)のFont Assetから、作ったフォントを指定します。

これで、日本語のテキストを表示できるようになりました。

テキストファイル(novel.txt)を読み込んで、順番に画面に表示
つづいて、テキストデータを読み込んでみましょう。
今回はnovel.txtファイルにシナリオを書いていき、それをスクリプトから読み込む、というい方法にしたいと思います。
novel.txtは以下のようにしました。
novel.txt
気がつけば人魚と話していた。
水面で揺らめく金色の髪。一点の濁りもない水中に見えるのは、コーラルピンクに輝く長い尾鰭。巨大な太陽に照らされながら、その人魚はこちらに手を伸ばした。
薄紅色の柔らかな唇が、優しく上下する。
「食べられる? ゆっくり食べてね」
なんの疑問もなく、人魚から海藻を受け取った。味はせず、美味しいとも不味いとも思わなかった。
波に合わせて体が上下に揺れている。わずかな差で人魚の体も揺れている。彼女の背後に見える陸地には、建物も電線も見当たらなかった。そして、それが当たり前だった。
「寒くない?」
「大丈夫──です」
人魚はくすくすと笑った。
「翔馬、少しずつだけど良くなってきてる」
どうして彼女は俺の名前を知ってるのだろうか──翔馬は不思議な感情を抱いた。しかし、波が体を揺らす心地よさに、いつの間にかその気持ちは消えてしまった。
「ありがとうございます、エレナ──さん」
「ふふ、エレナでいいのよ──」
エレナはにっこりと微笑んだ。プロジェクトからAssetsを選択し、Textsフォルダを作成します。

Textsフォルダを開き、そこにさきほど作成したnovel.txtをドラッグ&ドロップします。

Scriptsフォルダに、C# スクリプト(C# Script)を2つ作成します。
名前は、「MainTextController」、「UserScriptManager」とします。

今回、シナリオを記述したnovel.txtファイルには、シナリオだけではなく、背景やイベントCGの追加や削除をするための命令も記述できるようにしたいと思います。
そこでこの記事では、そういったシナリオや命令を書いたものを、「ユーザスクリプト(UserScript)」と呼ぶことにします。
画面に表示するシナリオは「MainTextController」によってコントロールし、テキストファイルに記述したユーザスクリプトは「UserScriptManager」で管理することにします。
では、ヒエラルキー(Hierarchy)で、「UserScriptManager」オブジェクトを作成しましょう。
オブジェクトは、「MainScene」右クリックして、「ゲームオブジェクト(GameObject)」から、「空のオブジェクトを作成(Create Empty)」をクリックすることで、作ることができます。

MainTextControllerファイルをMainTextオブジェクトに、UserScriptManagerファイルをUserScriptManagerオブジェクトに、ドラッグ&ドロップでアタッチします。

スクリプトは、次のようにします。
まずは、MainTextControllerからです。
MainTextController.cs
using System.Collections;
using System.Collections.Generic;
using UnityEngine;
using TMPro;

namespace NovelGame
{
    public class MainTextController : MonoBehaviour
    {
        [SerializeField] TextMeshProUGUI _mainTextObject;

        // Start is called before the first frame update
        void Start()
        {
            DisplayText();
        }

        // Update is called once per frame
        void Update()
        {
            // クリックされたとき、次の行へ移動
            if (Input.GetMouseButtonUp(0))
            {
                GoToTheNextLine();
                DisplayText();
            }
        }

        // 次の行へ移動
        public void GoToTheNextLine()
        {
            GameManager.Instance.lineNumber++;
        }

        // テキストを表示
        public void DisplayText()
        {
            string sentence = GameManager.Instance.userScriptManager.GetCurrentSentence();
            _mainTextObject.text = sentence;
        }
    }
}
つづいて、UserScriptManagerです。
Start、Updateメソッドは、今回使わないので、削除しています。
UserScriptManager.cs
using System.Collections;
using System.Collections.Generic;
using UnityEngine;
using System.IO;

namespace NovelGame
{
    public class UserScriptManager : MonoBehaviour
    {
        [SerializeField] TextAsset _textFile;

        // 文章中の文(ここでは1行ごと)を入れておくためのリスト
        List<string> _sentences = new List<string>();

        void Awake()
        {
            // テキストファイルの中身を、1行ずつリストに入れておく
            StringReader reader = new StringReader(_textFile.text);
            while (reader.Peek() != -1)
            {
                string line = reader.ReadLine();
                _sentences.Add(line);
            }
        }

        // 現在の行の文を取得する
        public string GetCurrentSentence()
        {
            return _sentences[GameManager.Instance.lineNumber];
        }
    }
}
GameManager.cs
using System.Collections;
using System.Collections.Generic;
using UnityEngine;

namespace NovelGame
{
    public class GameManager : MonoBehaviour
    {
        // 別のクラスからGameManagerの変数などを使えるようにするためのもの。(変更はできない)
        public static GameManager Instance { get; private set; }

        public UserScriptManager userScriptManager;
        public MainTextController mainTextController;

        // ユーザスクリプトの、今の行の数値。クリック(タップ)のたびに1ずつ増える。
        [System.NonSerialized] public int lineNumber;

        void Awake()
        {
            // これで、別のクラスからGameManagerの変数などを使えるようになる。
            Instance = this;

            lineNumber = 0;
        }
    }
}ヒエラルキー(Hierarchy)でMainTextオブジェクトを選択し、インスペクター(Inspector)のMain Text Objectに、シーンから「MainText」を追加します。

ヒエラルキー(Hierarchy)でGameManagerオブジェクトを選択し、インスペクター(Inspector)で、以下のように設定します。
- User Script Managerでは、シーンから「UserScriptManager」を選択。
- Main Text Controllerでは、シーンから「MainText」を選択。

ヒエラルキー(Hierarchy)でUserScriptManagerオブジェクトを選択します。
インスペクター(Inspector)のText Fileで、アセットから「novel」を選択します。

これで再生すると、novel.txtの最初の1行が表示され、クリックで順番にテキストが表示されていきます。

背景画像の表示
つづいて、背景画像を表示してみましょう。
フォルダの作成と、使いたい背景画像の追加
ではまず、表示する背景画像を入れておくフォルダを作りましょう。
フォルダ名は「Images」にしました。

さらにImagesフォルダを開いて、「Backgrounds」フォルダを作ります。

Backgroundsフォルダを開き、その中に使いたい背景画像をドラッグ&ドロップします。

これで背景画像を追加できました。
Prefabの作成
今回、画像の表示には、Prefabを使っていこうと思います。
「Background」を右クリックし、「UI」から、「画像(Image)」を選択します。

いま作った「Image」を選択し、インスペクター(Inspector)で、以下のように変更します。
- アンカープリセット(Anchor Presets)を縦横「stretch」のものに変更。
- 上下左右(Top、Bottom、Left、Right)の値をすべて「0」に変更。

そして、プロジェクト(Project)からAssetsフォルダを開き、ヒエラルキー(Hierarchy)から「Image」オブジェクトを、そこへドラッグ&ドロップします。

これで、「Image」というPrefabを作ることができました。

ヒエラルキー(Hierarchy)の「Image」はもう削除(Delete)してしまいましょう。

スクリプトを用意して背景画像を表示する
つづいて、実際に背景画像を表示してみます。
まずは、スクリプトを用意しましょう。ファイル名は「ImageManager」とします。

さらに、ヒエラルキー(Hierarchy)で、空のオブジェクトを作成し、名前を「ImageManager」にします。

ヒエラルキー(Hierarchy)のImageManagerオブジェクトに、プロジェクトのImageManagerファイルを、ドラッグ&ドロップします。

では、「ImageManager」ファイルを編集してみましょう。以下のようにします。
また、Start、Updateメソッドは必要ないので削除しました。
ImageManager.cs
using System.Collections;
using System.Collections.Generic;
using UnityEngine;
using UnityEngine.UI;

namespace NovelGame
{
    public class ImageManager : MonoBehaviour
    {
        [SerializeField] Sprite _background1;
        [SerializeField] GameObject _backgroundObject;
        [SerializeField] GameObject _imagePrefab;

        // テキストファイルから、文字列でSpriteやGameObjectを扱えるようにするための辞書
        Dictionary<string, Sprite> _textToSprite;
        Dictionary<string, GameObject> _textToParentObject;

        // 操作したいPrefabを指定できるようにするための辞書
        Dictionary<string, GameObject> _textToSpriteObject;

        void Awake()
        {
            _textToSprite = new Dictionary<string, Sprite>();
            _textToSprite.Add("background1", _background1);

            _textToParentObject = new Dictionary<string, GameObject>();
            _textToParentObject.Add("backgroundObject", _backgroundObject);

            _textToSpriteObject = new Dictionary<string, GameObject>();
        }

        // 画像を配置する
        public void PutImage(string imageName, string parentObjectName)
        {
            Sprite image = _textToSprite[imageName];
            GameObject parentObject = _textToParentObject[parentObjectName];

            Vector2 position = new Vector2(0, 0);
            Quaternion rotation = Quaternion.identity;
            Transform parent = parentObject.transform;
            GameObject item = Instantiate(_imagePrefab, position, rotation, parent);
            item.GetComponent<Image>().sprite = image;

            _textToSpriteObject.Add(imageName, item);
        }
    }
}さらに、ユーザスクリプトからの画像表示の命令を取得したいので、「UserScriptManager」ファイルを次のように編集します。
UserScriptManager.cs
using System.Collections;
using System.Collections.Generic;
using UnityEngine;
using System.IO;

namespace NovelGame
{
    public class UserScriptManager : MonoBehaviour
    {
        [SerializeField] TextAsset _textFile;

        // 文章中の文(ここでは1行ごと)を入れておくためのリスト
        List<string> _sentences = new List<string>();

        void Awake()
        {
            // テキストファイルの中身を、1行ずつリストに入れておく
            StringReader reader = new StringReader(_textFile.text);
            while (reader.Peek() != -1)
            {
                string line = reader.ReadLine();
                _sentences.Add(line);
            }
        }

        // 現在の行の文を取得する
        public string GetCurrentSentence()
        {
            return _sentences[GameManager.Instance.lineNumber];
        }

        // 文が命令かどうか
        public bool IsStatement(string sentence)
        {
            if (sentence[0] == '&')
            {
                return true;
            }
            return false;
        }

        // 命令を実行する
        public void ExecuteStatement(string sentence)
        {
            string[] words = sentence.Split(' ');
            switch(words[0])
            {
                case "&img":
                    GameManager.Instance.imageManager.PutImage(words[1], words[2]);
                    break;
            }
        }
    }
}また、テキストが次の行へ移動するとき、その行が文章なのか、命令なのかを判断する必要があるので、「MainTextController」ファイルも編集していきます。
MainTextController.cs
using System.Collections;
using System.Collections.Generic;
using UnityEngine;
using TMPro;

namespace NovelGame
{
    public class MainTextController : MonoBehaviour
    {
        [SerializeField] TextMeshProUGUI _mainTextObject;

        // Start is called before the first frame update
        void Start()
        {
            // 最初の行のテキストを表示、または命令を実行
            string statement = GameManager.Instance.userScriptManager.GetCurrentSentence();
            if (GameManager.Instance.userScriptManager.IsStatement(statement))
            {
                GameManager.Instance.userScriptManager.ExecuteStatement(statement);
                GoToTheNextLine();
            }
            DisplayText();
        }

        // Update is called once per frame
        void Update()
        {
            // クリックされたとき、次の行へ移動
            if (Input.GetMouseButtonUp(0))
            {
                GoToTheNextLine();
                DisplayText();
            }
        }

        // 次の行へ移動
        public void GoToTheNextLine()
        {
            GameManager.Instance.lineNumber++;
            string sentence = GameManager.Instance.userScriptManager.GetCurrentSentence();
            if (GameManager.Instance.userScriptManager.IsStatement(sentence))
            {
                GameManager.Instance.userScriptManager.ExecuteStatement(sentence);
                GoToTheNextLine();
            }
        }

        // テキストを表示
        public void DisplayText()
        {
            string sentence = GameManager.Instance.userScriptManager.GetCurrentSentence();
            _mainTextObject.text = sentence;
        }
    }
}「GameManager」ファイルも、ちょっとだけ編集します。
using System.Collections;
using System.Collections.Generic;
using UnityEngine;

namespace NovelGame
{
    public class GameManager : MonoBehaviour
    {
        // 別のクラスからGameManagerの変数などを使えるようにするためのもの。(変更はできない)
        public static GameManager Instance { get; private set; }

        public UserScriptManager userScriptManager;
        public MainTextController mainTextController;
        public ImageManager imageManager;

        // ユーザスクリプトの、今の行の数値。クリック(タップ)のたびに1ずつ増える。
        [System.NonSerialized] public int lineNumber;

        void Awake()
        {
            // これで、別のクラスからGameManagerの変数などを使えるようになる。
            Instance = this;

            lineNumber = 0;
        }
    }
}
ImageManagerオブジェクトを選択して、インスペクター(Inspector)を見ると、「Background1」、「Background Object」、「Image Prefab」という項目が増えていますので、それぞれ以下のように指定します。
- Background1には、「アセット」から「bg1」を指定。
- BackgroundBackground Objectには、「シーン」から「Background」を指定。
- Image Prefabには、「アセット」から「Image」を指定。

さらに、GameManagerオブジェクトを選択して、インスペクター(Inspector)から、Image ManagerにシーンからImageManagerを選択します。

あとは、novel.txtで、以下のように書いてみましょう。
novel.txt
&img background1 backgroundObject
気がつけば人魚と話していた。
水面で揺らめく金色の髪。一点の濁りもない水中に見えるのは、コーラルピンクに輝く長い尾鰭。巨大な太陽に照らされながら、その人魚はこちらに手を伸ばした。
薄紅色の柔らかな唇が、優しく上下する。
「食べられる? ゆっくり食べてね」
なんの疑問もなく、人魚から海藻を受け取った。味はせず、美味しいとも不味いとも思わなかった。
波に合わせて体が上下に揺れている。わずかな差で人魚の体も揺れている。彼女の背後に見える陸地には、建物も電線も見当たらなかった。そして、それが当たり前だった。
「寒くない?」
「大丈夫──です」
人魚はくすくすと笑った。
「翔馬、少しずつだけど良くなってきてる」
どうして彼女は俺の名前を知ってるのだろうか──翔馬は不思議な感情を抱いた。しかし、波が体を揺らす心地よさに、いつの間にかその気持ちは消えてしまった。
「ありがとうございます、エレナ──さん」
「ふふ、エレナでいいのよ──」
エレナはにっこりと微笑んだ。
これを再生すると、次のようになります。

再生したままの状態で、ヒエラルキー(Hierarchy)を確認すると、Backgroundオブジェクトの中に、「Image(Clone)」が作られているはずです。

イベントCGの表示
つづいて、イベントCGの表示をしていきます。
まず、Imagesフォルダの中に、「EventCG」フォルダを作成します。

作ったEventCGフォルダに、使いたいイベントCGをドラッグ&ドロップします。
今回は2つの画像ファイルを追加しました。

ImageManagerを、以下のようにします。
ImageManager.cs
using System.Collections;
using System.Collections.Generic;
using UnityEngine;
using UnityEngine.UI;

namespace NovelGame
{
    public class ImageManager : MonoBehaviour
    {
        [SerializeField] Sprite _background1;
        [SerializeField] Sprite _eventCG1;
        [SerializeField] Sprite _eventCG2;
        [SerializeField] GameObject _backgroundObject;
        [SerializeField] GameObject _eventObject;
        [SerializeField] GameObject _imagePrefab;

        // テキストファイルから、文字列でSpriteやGameObjectを扱えるようにするための辞書
        Dictionary<string, Sprite> _textToSprite;
        Dictionary<string, GameObject> _textToParentObject;

        // 操作したいPrefabを指定できるようにするための辞書
        Dictionary<string, GameObject> _textToSpriteObject;

        void Awake()
        {
            _textToSprite = new Dictionary<string, Sprite>();
            _textToSprite.Add("background1", _background1);
            _textToSprite.Add("eventCG1", _eventCG1);
            _textToSprite.Add("eventCG2", _eventCG2);

            _textToParentObject = new Dictionary<string, GameObject>();
            _textToParentObject.Add("backgroundObject", _backgroundObject);
            _textToParentObject.Add("eventObject", _eventObject);

            _textToSpriteObject = new Dictionary<string, GameObject>();
        }

        // 画像を配置する
        public void PutImage(string imageName, string parentObjectName)
        {
            Sprite image = _textToSprite[imageName];
            GameObject parentObject = _textToParentObject[parentObjectName];

            Vector2 position = new Vector2(0, 0);
            Quaternion rotation = Quaternion.identity;
            Transform parent = parentObject.transform;
            GameObject item = Instantiate(_imagePrefab, position, rotation, parent);
            item.GetComponent<Image>().sprite = image;

            _textToSpriteObject.Add(imageName, item);
        }
    }
}ImageManagerオブジェクトを選択し、インスペクター(Inspector)で、Event CG1とEvent CG2にさきほどのイベントCGを指定し、Event Objectには「Event」オブジェクトを指定します。

あとは、novel.txtに、イベントCGを表示する命令を追加します。
&img background1 backgroundObject
&img eventCG1 eventObject
気がつけば人魚と話していた。
水面で揺らめく金色の髪。一点の濁りもない水中に見えるのは、コーラルピンクに輝く長い尾鰭。巨大な太陽に照らされながら、その人魚はこちらに手を伸ばした。
薄紅色の柔らかな唇が、優しく上下する。
「食べられる? ゆっくり食べてね」
なんの疑問もなく、人魚から海藻を受け取った。味はせず、美味しいとも不味いとも思わなかった。
波に合わせて体が上下に揺れている。わずかな差で人魚の体も揺れている。彼女の背後に見える陸地には、建物も電線も見当たらなかった。そして、それが当たり前だった。
「寒くない?」
「大丈夫──です」
人魚はくすくすと笑った。
「翔馬、少しずつだけど良くなってきてる」
どうして彼女は俺の名前を知ってるのだろうか──翔馬は不思議な感情を抱いた。しかし、波が体を揺らす心地よさに、いつの間にかその気持ちは消えてしまった。
「ありがとうございます、エレナ──さん」
「ふふ、エレナでいいのよ──」
エレナはにっこりと微笑んだ。
これで再生すると、このようになります。

イベントCGだけが表示されているように見えますが、ヒエラルキー(Hierarchy)を見ると、さきほど表示した背景画像と、今回のイベントCGが、同時に表示されていることが分かります。

画像(Prefab)の削除
つづいて、さきほど表示した背景画像やイベントCGのPrefabを、削除できるようにしていこうと思います。
まずはImageManagerファイルに、画像を削除するためのメソッドを作成しましょう。
ImageManager.cs
using System.Collections;
using System.Collections.Generic;
using UnityEngine;
using UnityEngine.UI;

namespace NovelGame
{
    public class ImageManager : MonoBehaviour
    {
        [SerializeField] Sprite _background1;
        [SerializeField] Sprite _eventCG1;
        [SerializeField] Sprite _eventCG2;
        [SerializeField] GameObject _backgroundObject;
        [SerializeField] GameObject _eventObject;
        [SerializeField] GameObject _imagePrefab;

        // テキストファイルから、文字列でSpriteやGameObjectを扱えるようにするための辞書
        Dictionary<string, Sprite> _textToSprite;
        Dictionary<string, GameObject> _textToParentObject;

        // 操作したいPrefabを指定できるようにするための辞書
        Dictionary<string, GameObject> _textToSpriteObject;

        void Awake()
        {
            _textToSprite = new Dictionary<string, Sprite>();
            _textToSprite.Add("background1", _background1);
            _textToSprite.Add("eventCG1", _eventCG1);
            _textToSprite.Add("eventCG2", _eventCG2);

            _textToParentObject = new Dictionary<string, GameObject>();
            _textToParentObject.Add("backgroundObject", _backgroundObject);
            _textToParentObject.Add("eventObject", _eventObject);

            _textToSpriteObject = new Dictionary<string, GameObject>();
        }

        // 画像を配置する
        public void PutImage(string imageName, string parentObjectName)
        {
            Sprite image = _textToSprite[imageName];
            GameObject parentObject = _textToParentObject[parentObjectName];

            Vector2 position = new Vector2(0, 0);
            Quaternion rotation = Quaternion.identity;
            Transform parent = parentObject.transform;
            GameObject item = Instantiate(_imagePrefab, position, rotation, parent);
            item.GetComponent<Image>().sprite = image;

            _textToSpriteObject.Add(imageName, item);
        }

        // 画像を削除する
        public void RemoveImage(string imageName)
        {
            Destroy(_textToSpriteObject[imageName]);
        }
    }
}つづいて、UserScriptManagerファイルに、画像を削除する命令を作ります。
UserScriptManager.cs
using System.Collections;
using System.Collections.Generic;
using UnityEngine;
using System.IO;

namespace NovelGame
{
    public class UserScriptManager : MonoBehaviour
    {
        [SerializeField] TextAsset _textFile;

        // 文章中の文(ここでは1行ごと)を入れておくためのリスト
        List<string> _sentences = new List<string>();

        void Awake()
        {
            // テキストファイルの中身を、1行ずつリストに入れておく
            StringReader reader = new StringReader(_textFile.text);
            while (reader.Peek() != -1)
            {
                string line = reader.ReadLine();
                _sentences.Add(line);
            }
        }

        // 現在の行の文を取得する
        public string GetCurrentSentence()
        {
            return _sentences[GameManager.Instance.lineNumber];
        }

        // 文が命令かどうか
        public bool IsStatement(string sentence)
        {
            if (sentence[0] == '&')
            {
                return true;
            }
            return false;
        }

        // 命令を実行する
        public void ExecuteStatement(string sentence)
        {
            string[] words = sentence.Split(' ');
            switch(words[0])
            {
                case "&img":
                    GameManager.Instance.imageManager.PutImage(words[1], words[2]);
                    break;
                case "&rmimg":
                    GameManager.Instance.imageManager.RemoveImage(words[1]);
                    break;
            }
        }
    }
}テキストファイルでは、もうちょっとシナリオを長くして、画像の表示と削除を試してみます。
novel.txt
&img eventCG1 eventObject
気がつけば人魚と話していた。
水面で揺らめく金色の髪。一点の濁りもない水中に見えるのは、コーラルピンクに輝く長い尾鰭。巨大な太陽に照らされながら、その人魚はこちらに手を伸ばした。
薄紅色の柔らかな唇が、優しく上下する。
「食べられる? ゆっくり食べてね」
なんの疑問もなく、人魚から海藻を受け取った。味はせず、美味しいとも不味いとも思わなかった。
波に合わせて体が上下に揺れている。わずかな差で人魚の体も揺れている。彼女の背後に見える陸地には、建物も電線も見当たらなかった。そして、それが当たり前だった。
「寒くない?」
「大丈夫──です」
人魚はくすくすと笑った。
「翔馬、少しずつだけど良くなってきてる」
どうして彼女は俺の名前を知ってるのだろうか──翔馬は不思議な感情を抱いた。しかし、波が体を揺らす心地よさに、いつの間にかその気持ちは消えてしまった。
「ありがとうございます、エレナ──さん」
「ふふ、エレナでいいのよ──」
エレナはにっこりと微笑んだ。
&rmimg eventCG1
&img background1 backgroundObject
川を眺めていると、兄に会えそうな気がした。
稲生沢川に架かる橋の歩道で、笹倉翔馬は欄干に肘を置いて体重を預けながら、汗で湿った半袖のスクールシャツを肩まで捲った。
この川はすぐ海に出る。人が生まれ、やがて最期を迎えるように、運命に逆らうことなくゆっくりと流れていく。
失われた命は二度と戻らない。過ぎた時間は巻き戻らない。神の定めた理論に抗うことはできない──
翔馬は欄干に置いていた残りわずかのコーラを飲み干した。視界に飛び込んできた空には雲ひとつなく、その果てしない青色が兄との海を連想させる。兄との思い出の海──
「死は黒じゃなくて透明だ」と父が言っていたが、あの日、兄と見た海はまさに透き通っていた。
ペットボトルにキャップをしたとき、背後からトンと肩を叩かれた。翔馬は川を見つめたまま、
「正樹か?」
「あれ、なんで分かったんだ?」
「いつものことだろ」
「確かに」
&img eventCG2 eventObject
笑い声に振り返ると、白い歯を見せる橋本正樹と目が合った。
着崩したシャツ、耳が少し隠れるぐらいの茶髪、日に焼けた肌。左腕の大きな傷は、幼いころに三輪車で転んだときのものらしい。
翔馬とは真逆のタイプだが、どういうわけか馬が合い、一年のころに仲良くなった。
正樹は翔馬の隣で欄干に背中を預け、目の前の人魚像を眺める。橋の四隅に置かれたうちのひとつだ。
「この前、直してもらったバイク、調子いいよ。翔ちゃんのお父さんすげぇな」
「そんなことしか能がないからな」
&rmimg eventCG2
正樹は川の方を向いた。
「いや、すげぇよ。オレもバイク分解してみようかな」
これで再生すると、シナリオと画像がマッチした、ノベルゲームになります。

テキストを1文字ずつ表示
最後に、もう少しノベルゲームらしくするために、テキストを1文字ずつ表示できるようにしていきます。
MainTextController.cs
using System.Collections;
using System.Collections.Generic;
using UnityEngine;
using TMPro;

namespace NovelGame
{
    public class MainTextController : MonoBehaviour
    {
        [SerializeField] TextMeshProUGUI _mainTextObject;
        int _displayedSentenceLength;
        float _time;
        float _feedTime;

        // Start is called before the first frame update
        void Start()
        {
            _time = 0f;
            _feedTime = 0.05f;

            // 最初の行のテキストを表示、または命令を実行
            string statement = GameManager.Instance.userScriptManager.GetCurrentSentence();
            if (GameManager.Instance.userScriptManager.IsStatement(statement))
            {
                GameManager.Instance.userScriptManager.ExecuteStatement(statement);
                GoToTheNextLine();
            }
            DisplayText();
        }

        // Update is called once per frame
        void Update()
        {
            // 文章を1文字ずつ表示する
            _time += Time.deltaTime;
            if (_time >= _feedTime)
            {
                _time -= _feedTime;
                if (!CanGoToTheNextLine())
                {
                    _displayedSentenceLength++;
                    _mainTextObject.maxVisibleCharacters = _displayedSentenceLength;
                }
            }

            // クリックされたとき、次の行へ移動
            if (Input.GetMouseButtonUp(0))
            {
                if (CanGoToTheNextLine())
                {
                    GoToTheNextLine();
                    DisplayText();
                }
            }
        }

        // その行の、すべての文字が表示されていなければ、まだ次の行へ進むことはできない
        public bool CanGoToTheNextLine()
        {
            string sentence = GameManager.Instance.userScriptManager.GetCurrentSentence();
            return (_displayedSentenceLength > sentence.Length);
        }

        // 次の行へ移動
        public void GoToTheNextLine()
        {
            _displayedSentenceLength = 0;
            _time = 0f;
            _mainTextObject.maxVisibleCharacters = 0;
            GameManager.Instance.lineNumber++;
            string sentence = GameManager.Instance.userScriptManager.GetCurrentSentence();
            if (GameManager.Instance.userScriptManager.IsStatement(sentence))
            {
                GameManager.Instance.userScriptManager.ExecuteStatement(sentence);
                GoToTheNextLine();
            }
        }

        // テキストを表示
        public void DisplayText()
        {
            string sentence = GameManager.Instance.userScriptManager.GetCurrentSentence();
            _mainTextObject.text = sentence;
        }
    }
}
これで再生すると、テキストが1文字ずつ表示されます。

しかしこのままでは、すべての文字が表示されるまで、次の行へ進めなくなってしまいます。
そこで、まだすべての文字が表示されていないとき、クリックすると、すべての文字が表示されるようにします。
using System.Collections;
using System.Collections.Generic;
using UnityEngine;
using TMPro;

namespace NovelGame
{
    public class MainTextController : MonoBehaviour
    {
        [SerializeField] TextMeshProUGUI _mainTextObject;
        int _displayedSentenceLength;
        int _sentenceLength;
        float _time;
        float _feedTime;

        // Start is called before the first frame update
        void Start()
        {
            _time = 0f;
            _feedTime = 0.05f;

            // 最初の行のテキストを表示、または命令を実行
            string statement = GameManager.Instance.userScriptManager.GetCurrentSentence();
            if (GameManager.Instance.userScriptManager.IsStatement(statement))
            {
                GameManager.Instance.userScriptManager.ExecuteStatement(statement);
                GoToTheNextLine();
            }
            DisplayText();
        }

        // Update is called once per frame
        void Update()
        {
            // 文章を1文字ずつ表示する
            _time += Time.deltaTime;
            if (_time >= _feedTime)
            {
                _time -= _feedTime;
                if (!CanGoToTheNextLine())
                {
                    _displayedSentenceLength++;
                    _mainTextObject.maxVisibleCharacters = _displayedSentenceLength;
                }
            }

            // クリックされたとき、次の行へ移動
            if (Input.GetMouseButtonUp(0))
            {
                if (CanGoToTheNextLine())
                {
                    GoToTheNextLine();
                    DisplayText();
                }
                else
                {
                    _displayedSentenceLength = _sentenceLength;
                }
            }
        }

        // その行の、すべての文字が表示されていなければ、まだ次の行へ進むことはできない
        public bool CanGoToTheNextLine()
        {
            string sentence = GameManager.Instance.userScriptManager.GetCurrentSentence();
            _sentenceLength = sentence.Length;
            return (_displayedSentenceLength > sentence.Length);
        }

        // 次の行へ移動
        public void GoToTheNextLine()
        {
            _displayedSentenceLength = 0;
            _time = 0f;
            _mainTextObject.maxVisibleCharacters = 0;
            GameManager.Instance.lineNumber++;
            string sentence = GameManager.Instance.userScriptManager.GetCurrentSentence();
            if (GameManager.Instance.userScriptManager.IsStatement(sentence))
            {
                GameManager.Instance.userScriptManager.ExecuteStatement(sentence);
                GoToTheNextLine();
            }
        }

        // テキストを表示
        public void DisplayText()
        {
            string sentence = GameManager.Instance.userScriptManager.GetCurrentSentence();
            _mainTextObject.text = sentence;
        }
    }
}
これで、まだ文字の表示が途中の場合でも、クリックですべての文字を表示できるようになります。
まとめ
今回はUnity 2Dでの、ノベルゲームの作り方を紹介しました。
ノベルゲームの開発は、他のゲームと比べると簡単ではありますが、テキストを一文字ずつ表示させたり、画像を表示させたりといった、ゲーム開発の基本になる部分が含まれます。
また、今回作成したものは、現在私が開発中のノベルゲームの一部分でもあります。ゲーム公開を目指して、懸命に取り組んでいきたいと思います。